After sanding the parts, some of the panel lines were a bit shallower than normal, so I decided to deepen the lines.
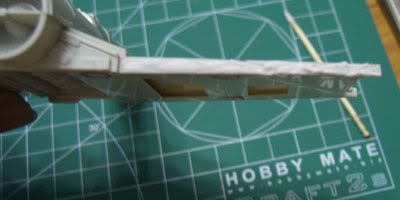
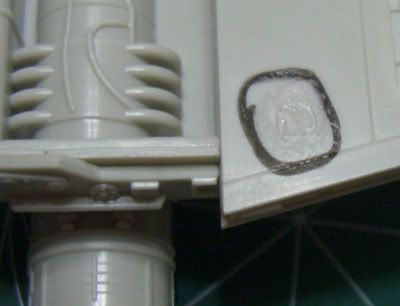
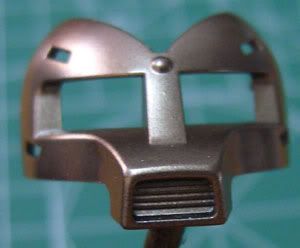
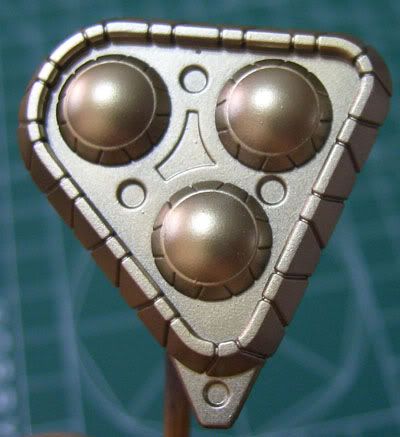
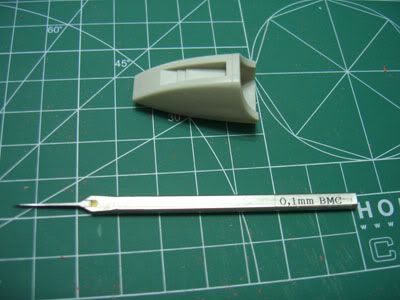
I used a pen knife to deepen the mark first, then deepen the panel lines using 0.1 mm BMC scriber to deepen the panel lines. The benefit of using the BMC scriber compared to Tamiya Plastic Scriber is that the lines do not widen with each cut, the width of the line is always consistent.
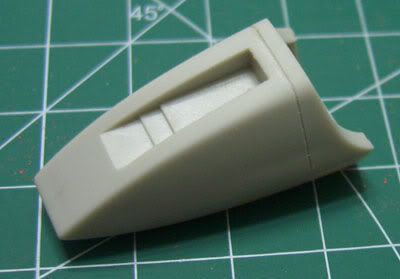
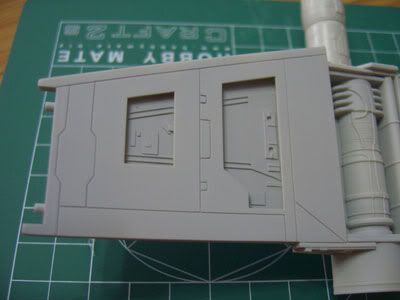
Now the lines looks more even, but it is taking pretty long time to make sure they are neat (especially right-angled lines) Looks like this build will take longer than expected, back to work.
To be continued.
Showing posts with label WIP. Show all posts
Thursday, February 24, 2011
Wednesday, February 23, 2011
WIP - Fine Mold 1/48 X-Wing - Part 2
Using SSP-HG putty. The package contains a bottle of powder, 2 bottles of glue, 3 pieces of wax paper, a scoop and a applicator as shown in photo below.
Place some powder on the wax paper and add some glue.
Mix the two parts till it turns a little pink. If too much powder is added to glue, it drys really quickly (in the matter of seconds). If you get the right mix, you got about 30 seconds to apply the putty.
I marked out the sink marked that I want to fill with a gundam marker, so I don't have to look for them when the putty is drying.
By the time I started to take photos, the putty seems dry, will try sanding in a while just to be safe.
Back to sanding, at least I don't have to wait a day or 2 for the putty to cure. Back to work.
To be continued
Tuesday, February 22, 2011
WIP - Fine Mold 1/48 X-Wing - Part 1
Inspired by DC23 1/72 X-Wing fighter, I dug up my 1/48 X-Wing fighter from my store and started a quick snap fit of the kit. I discovered quite a few sink marks on the kit, so it's probably going to take some time to remove the sink marks and redo the panel lines. Overall fitting for the kit is pretty good.
Trying out a new type of putty for this kit. SSP-HG. This putty is mostly use for sculpting and scratch building. It's not very popular in Singapore because of the cost (abt S$30). I am trying it out, because it will not sink as it dries like the Tamiya basic putty and it is fairly easy to shave and sand (Like sanding resin material).
A snap fit of the kit, plenty of puttying and sanding ahead.
To be continued.
Wednesday, February 16, 2011
WIP - Sanguoken Shin Totaku Zaku - Part 1
Just started on this model kit. Plastic is pretty hard, so I had to be careful during cutting or else I will end up with tons of holes to patch up. This build will be pretty much OOB with maybe some minor detailing. I am try to get a colour scheme to portray this evil character and I was planning on borrowing the colour scheme used by leon ku on his megatron.
Although the colour scheme on Shin Totaku Zaku will not have as many colour, I will be adopting the steel colour with a slight gold tinge and the pale gold combination. Preliminary test of colours are as follows:
1. Steel
2. Pale Gold
- To be continued -
Although the colour scheme on Shin Totaku Zaku will not have as many colour, I will be adopting the steel colour with a slight gold tinge and the pale gold combination. Preliminary test of colours are as follows:
1. Steel
2. Pale Gold
- To be continued -
Monday, February 14, 2011
WIP - Sanguoken Kan Pei Gundam
Was trying out metallic finishing using normal paint mixed with gloss clear sprayed over Gaia EX silver. The effect was acceptable, pretty much like use clear colour paints. Almost done with this model, left with masking and spray the chest piece and the backpack. Also need to finish panel-lining all the parts. This model took longer than expected due to the extensive need for masking, will probably use hand painting for the final details next time. I did cut some corners and used the stickers provided for the kit. Hopefully I will be able to finish this few days.
Subscribe to:
Posts (Atom)